Sunday, 6 December 2020
Monday, 29 June 2020
Useful Chrome Extensions for Google Meet
Here are some useful extensions for Google Meet.
Meet Auto Admit
If you install this extension in chrome then in Google meet rooms it will automatically lets users login by clicking the admit button on the popup.
No need to click on admit button to admit people to the meeting.
Google Meet Attendance
The extension records which students attended, when they arrived and how long they stayed with all of the information displayed in a tidy HTML report.
You can also donwload the information as a .csv file. It also allows you to create a class list which you can create for each class. This makes it convenient to records the list of students who attended the meeting.
Google Meet Grid View
This extension adds a button to the top right bar (next to chat & participant list) to enable grid-view in Google Meets. Grid view gives every participant an equal sized video for use in meetings without a primary speaker (such as working from home silent meetings).
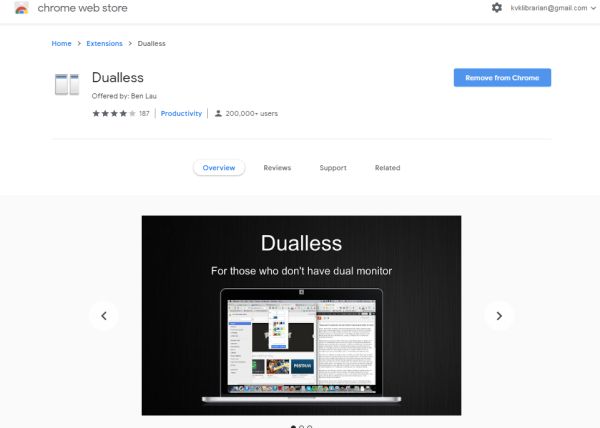
Dualless
Monday, 15 June 2020
Apowersoft Free Online Screen Recorder - Tools to Record your screen
Features
How to Record Your Screen
Click on Start Recording
If you are using it for the first time, you will have to download the launcher application and install it. The launcher application is a very small file that will be downloaded quickly. Click on the apowersoft launcher to install it. Once it is installed, you are ready to start recording
Click on Start Recording and click Open Apowersoft Launcher.exe. The following toolbar will appear and you can select the required options and click REC button to start recording.
Once the recording starts, the toolbar will change to provide different to tools to add text, annotations, drawings etc to the screen.
Click on the stop button to finish recording. Your recorded video will open in a window and at the bottom you will find options to save the video to your computer.
Watch the video to learn how to record your screen using Apowersoft Free Online Screen Recorder
More Free Softwares
OBS Studio
This one is not so easy to setup and use compared to the others.
Screen Castify
Screencast-O-Matic
Sunday, 14 June 2020
VSDC Free Screen Recorder Software
VSDC Free Screen Recorder Software
The program is intended for capturing desktop screenshots and creating video files of any format. You can capture the entire desktop or a specific area only. The software can record audio or voice from various external sound devices, such as a microphone or line in. That is why you can use this program to easily create video tutorials and presentationYou can download Free Screen Recorder and use it absolutely free of charge! There are no advertisements or other bundled malware.
The software can be downloaded from here
You can also download their Free Video Editor, which has the facility to video capture and screen capture. They have also got a free video converter and audio converters for download at http://www.videosoftdev.com/
Saturday, 13 June 2020
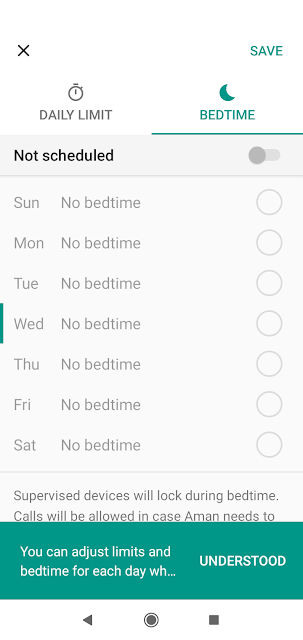
Google Family Link - Setting Up the Devices
Family Link from Google is an excellent tool to help your child be safe on the internet. It may not be a perfect tool, but it can help the parents to control the online activities of their children to an extent. The app is meant to help parents remotely control and keep track of their children’s Android device activities and help them set digital ground rules by managing what their kids are up to and what Google Accounts, devices and apps they are using. Parents can also manage some of their child's account settings on a web browser. Parents can manage their child’s Chromebook and account settings, and set website restrictions.
Requirements
- A Google Account for your child (you can create the account as given in the previous tutorial or you can do this within the Family Link app)
- An Android device for your child that’s running Android 7.0 Nougat or later (a few devices running Android 5.0 and 6.0 (Lollipop and Marshmallow) may also work)
- Your own Android device running versions 5.0 (Lollipop) and higher, and iPhones running iOS9 and higher.
- Your own Google Account
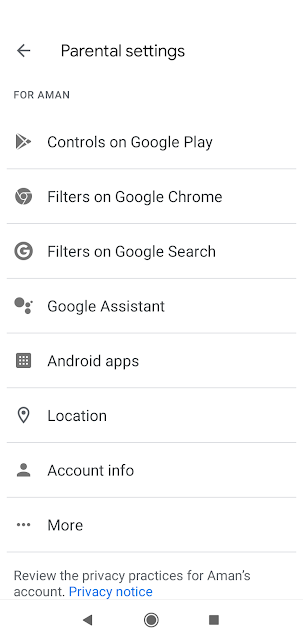
Controls on Google Play
- All content (Require approval for all downloads, including free content and apps)
- All paid content (Require approval when purchasing paid apps and media, but not for free downloads)
- Only in-app purchases (Only require approvals when trying to buy products in an app or game, such as Fortnite or Pokemon Go; all other purchases are allowed)
- No approval required (You will not be notified of purchases/downloads)
Filters on Google Chrome
Filters on Google Search
Google Assistant
Android Apps
Location
Other settings
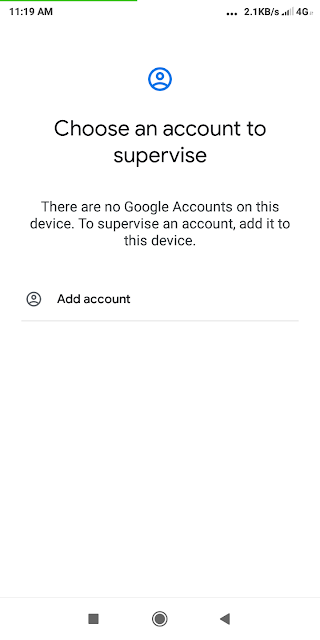
Setting Up the Child's Device
Friday, 12 June 2020
Create a Google Account for your Child and Manage it through Google Family Link
The COVID lock down has made it now necessary for our children to have a Google account to access the online classes conducted by the schools through Google Classroom and other virtual classroom platforms. Most of the cases the parents are giving their wards their own e-mail id to join the classroom. This may create many practical difficulties for the students, parents and teachers. For parents, it may not be advisable to let their child use their Google accounts as that may cause problems. Creating another ID in parents name for this purpose may be a good idea. But, as the students are enrolled under the name of the parents in Google Classroom, this creates practical difficulties for the teachers to manage the grades of their students properly.
- Update your child's account info & some settings
- Such as his name and birthday.
- Delete his account
- You can recover his account for a limited period of time after you delete it.
- Manage his activity controls
- You can manage settings such as how Google collects your child's Web & App Activity.
Friday, 29 May 2020
Etiquette on WhatsApp Groups
Thursday, 14 May 2020
Create a Quiz in Google Form
First sign in to Google Forms.
Sunday, 10 May 2020
How to Submit Your Blog to Search Engines
The reason is very simple: Google is not aware of your blog's existence. Wondering why? Normally search engines like Google discover new websites/blogs by crawling the web. They find new links on existing websites and follow them. If your website is a few days/weeks old and is not linked from other websites, most probably it will take some time to search engines to find your blog and index them automatically.
So, it is effective if you submit your blog/website to search engines like Google. We will see how to submit your blog to search engines.
Submit Your Blog to Google
Follow these steps to submit your blog to Google Search Console
In the domain enter the URL of your blog without the http or https prefix (e.g kv-library.blogspot.com)
Click on Continue.. Google will verify ownership. As it is on Blogger domain Google will auto-verify your blog.
You will be taken to Google Search Console.
Next, you will have to submit a sitemap
Sitemap of Your Blog
Don't forget to change give the correct url of your blog instead of yourblogdomainname.blogspot.com
Click on Save changes
If you have more than 500 pages you can add more sitemaps changing the startindex and max-results values.
Submit Your Sitemap to Google Search Console
Submit and Individual Page to Google
Bing is a web search engine owned and operated by Microsoft and is the third largest search engine globally. You can submit the sitemap of your blog to Bing to get indexed by the search engine.
How to Submit Your Blog to Bing
You will have verify ownership of your site by adding a meta tag to your blog. Bing will provide you with a meta tag which will look something like this:
<meta name="msvalidate.01" content="SOMEVALUEHERE" />
To add meta tag, go to Theme->Edit HTML. When the HTML code editor opens, click inside the box and press Ctrl+F to open a search box. Now type </head> in the search box and press Enter Key. When the </head> tag is found paste the meta tag from Bing just before the </head> tag. Now Click on Save Theme to save changes. Take care not to delete the </head> tag.
Go back to Bing Webmaster Tools and click on Verify button.
Saturday, 9 May 2020
Create a Horizontal Menu Bar with Sub Menu for Blogger
Adding A Horizontal Menu With Sub Menus to Blogger
<ul>
<li><a href="default.html">Home</a></li>
<li><a href="contact.html">Contact</a></li>
<li><a href="#">Links</a></li>
</ul>
You can see the <a> HTML tag is used for each <li> tag to provide links to the list item. A "#" can be provided where you don't want an item to be clickable. You can add more links to the list by by copying the line <li>....</li> and changing the link and title for the list item (highlighted in red). These are the menu items. So we have three menu items in the list above. If you need to add submenu to any of the menu items above, you will have to add a list under the menu item. For example, you want to add two submenu items to the Links menu as follows
<ul>
<li><a href="http://cbse.nic.in">CBSE</a></li>
<li><a href="http://ncert.nic.in">NCERT</a></li>
</ul>
We will add the submenu as follows:
<ul>
<li><a href="default.html">Home</a></li>
<li><a href="contact.html">Contact</a></li>
<li><a href="#">Links</a>
<ul>
<li><a href="http://cbse.nic.in">CBSE</a></li>
<li><a href="http://ncert.nic.in">NCERT</a></li>
</ul>
</li>
</ul>
Note that we just placed the new list just before the closing </li> tag for the menu item. We have given "#" instead the URL, as we do not want the menu to be linked to any website as it has submenu. You can copy and paste the lists and make changes to the menu as required. In the box below you can create your menu by modifying the list items. Remember that when you are deleting an item remove the complete line <li>...</li> , else it will not render properly. Only add menus that can be accommodated in a single line.
Copy the content inside the above box to clipboard.
Now go to blogger and login to your account.
Go to your "Layout" and on the "Page Elements" section:
- Click on the "Add a Gadget" link just under your header image (cross-column 1)
- From the Gadget's List, select "HTML/JavaScript" option.
- Paste the copied HTML code inside the body. Do not provide any title to this gadget
- Click on Save
Copy the complete CSS style text from the box above.
- In Blogger, click on Theme and then click Customise button.
- Click on Advanced tab on the left and then click on Add CSS option at the bottom
- Paste the copied CSS Style inside the box.
- Click on Apply to Blog
Now view the blog to see the menu working.
You can change the color of the background, link text, hover effects etc by making changes to the CSS Style. I have created a CSS Maker for your convenience where you can select the colors for your menu and the generated CSS Style can be copied and pasted to get the desired effect.
Click here for the CSS Maker (The CSS Maker is only useful for this menu)
Friday, 1 May 2020
Google Classroom: Adding Classworks
Google Classroom gives you the ability to create and assign work and conduct online tests to your students. To create new assignments, tests, or add materials and resources to your class, you'll have to use the Classwork tab.
Click here to learn how to create a class on Google Classroom
Classwork Tutorial 2
Thursday, 30 April 2020
Google Classroom: How to Create a Class
Google Classroom can be created very easily by following the steps given below:
Click here to learn how to add classworks - assignments, quizzes etc to your class
Tuesday, 28 April 2020
How to Add Scrolling Images to Blog
In a library blog, the scrolling images will be useful to display the covers of the books newly added to the library.
How to Add Scrolling Text to Your Blog
Copy Paste from Word to Blogger : How to Rectify Formatting Issues
This happens because the formatting of MS Word is not the same as Blogger formatting. You can tidy up the HTML in the following ways.
Blogger Tutorial Part XII: Theme and Layout - Gadgets Continued
We will see the list links gadget and create a menu bar for our blog. The other gadgets covered include popular posts, feeds and blog list
Blogger Tutorial Part XI: Theme and Layout II
In this video you will learn few more gadgets like
- Adding a featured post to hightlight any one special post
- Adding a search box to blog
- Adding HTML/Javascript (This is a very useful gadget which can be used for many purposes. We will have a separate session on this)
- Adding followers and button to follow your blog
- Pages Gadget: making your pages visible and creating a menu bar below your header
Blogger Tutorial Part X: Theme and Layout
Blogger Tutorial Part X: Theme and Layout
This is the first part of the sessions covering the theme and layout. Theme and layout determines the look and feel of your blog and is full of interesting gadgets to explore. In this tutorial I have included the following- Change and customise your blog's theme and layout: how to change background colour, how to change width, change layout and number of sidebars, how to add an image as background and change the color and font style for blog elements like title, body, hyperlinks etc.
- Changing layout and adding gadgets in this session covers : changing the favicon for your blog, creating an attractive image header for your blog, changing display of blog archives (the links to your posts) and making them in the chronological order from old to new.
Blogger Tutorial Part IX Settings - Other and User Settings
In this video, the remaining two options under settings are covered i.e Other and User Settings
You will learn to:
- Backup your blog content and restore
- Backup your blog theme and restore it
- Manage videos you have uploaded on blogger
- Manage site feeds
- Manage your blogger profile
Blogger Tutorial Part VIII: Settings - Search Preferences Settings
In this video, you will learn about the basic search preference setting on Blogger.
These settings will help you get your blog better indexed on search engines.
- Add a search description to your blog that will appear on search engine results
- Add a search description for your posts
- Add a custom error page with some informative messages
- Make a static page as your homepage of your blog
- Redirect your blog traffic to another page
- Make a Static Page your home page
Blogger Tutorial Part VII: Settings - Email, Language Formatting Settings
In the basic settings, we have seen how to add authors to collaborate in our blog. When we add an author we allow them access to the blog and post content without our approval before posting.
Another way to get others to post on our blog is to enable post through e-mail feature where we can give a secret blogger email id to our students/collaborators to send their posts/articles. The received posts will be saved as draft posts which we can open and review before deciding whether to publish it or not.
Also we will discuss setting blog language and creating our blog in languages other than English
Blogger Tutorial Part VI: Settings - Posts, Comments and Sharing Settings
In this video you will learn
- how to control the number of posts that should appear on home page
- how to restrict comments on your blogs
- how to moderate blog comments
Blogger Tutorial Part V: Blogger Setting - Basic Settings
Now we will be discussing the various Blogger settings. You need not make changes to many of the Blogger settings as the default will work fine for normal users. So if you are confused about any of the settings you may ask and I will explain it.
This video will cover the following
- Changing your Blog Title
- Adding a Description
- Privacy Settings
- Changing Domain Name and Adding Third Party Domain Names
- Blog Permissions: Adding Collaborators
- Blog Readers: Restricting Access to Your Blog
Blogger Tutorial Part IV: Post Setting and Creating Pages
In this session we will discuss
- Compose and HTML Tabs in Post Editor
- Adding Labels to Categorise Content
- Scheduling a Post
- Adding Location to your post
- Enable/disable comments for a post
- Creating Pages
- Difference between Blogger Posts and Pages
Blogger Tutorial Part III: Insert Hyperlinks and Videos in Your Post
Blogger Tutorial Part II: Add Content to Blogger
In this tutorial you will learn
- How to create a post
- How to add images to your post
- How to manage the images
Blogger Tutorial Part I: Create Your Blog
Creating a blog on Blogger is very easy and no technical skills are required to get your blog working within a few minutes. First you should have a Google account to create a blog.
Thursday, 23 April 2020
Blogger Features and Limitations
Q. How many blogs can I have on Blogger?
Ans: You can creates up to 100 blogs on Blogger using a Google account. I think that will be more than enough!
Q. How to create multiple blogs using a Google Account?
To create more blogs, follow the steps below
Login to your Blogger account.
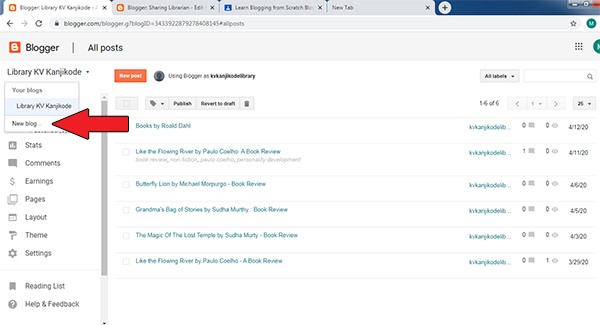
In the Blogger Dashboard click on the title of your blog on the top-left side. In the drop-down click on New Blog... link to create a new blog.
Q. How many collaborators can be added to a blog?
Ans: You can have up to 100 collaborators or authors to your blog.
Q. What is the maximum number of posts I can have on my blog?
Ans: There is no limit for number of posts or pages you can have on your blog. Blogger provide an image storage limit of 1 GB. Uploaded photos or videos will count towards your storage limit if:
If either the height or width of your photo exceeds 2,048 pixels.
The video is longer than 15 minutes.
There is a limit of 200 characters for labels for an individual blog post


